the BLOG
Photos, reviews, tips & more
|
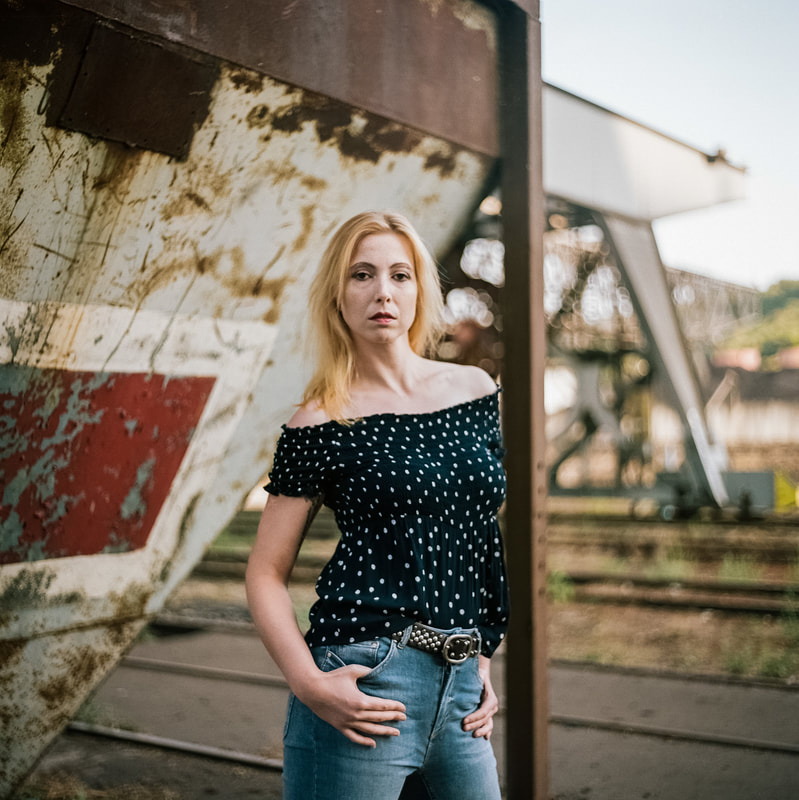
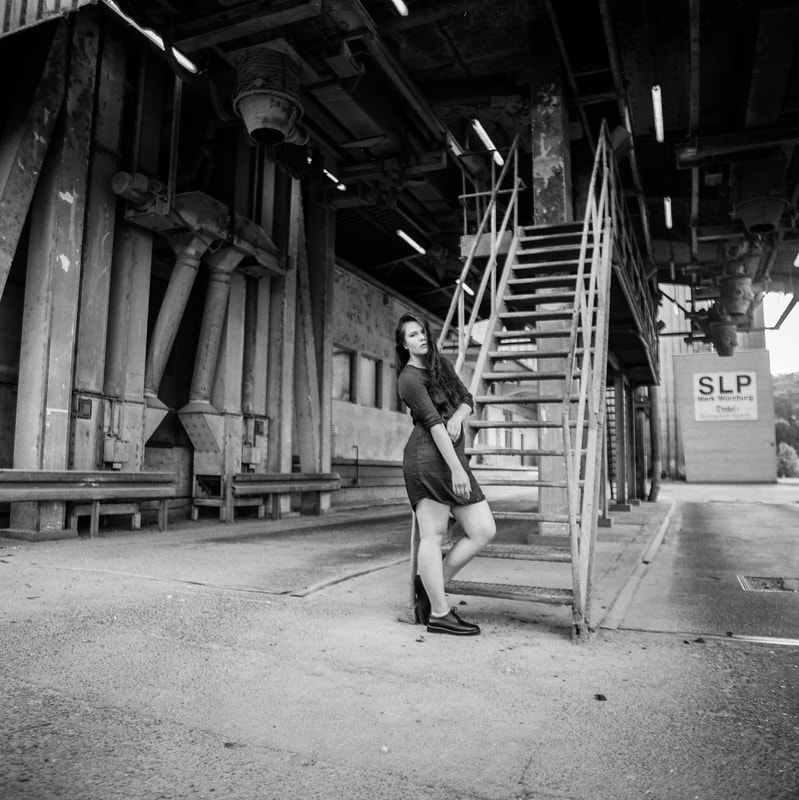
Warum zum Teufel fotografiert man in 2018 noch analog? Gute Frage, was mich in die Welt des Films geführt hat war ein Vorschlag auf eBayKleinanzeigen. Eine Mittelformatkamera aus Russland für 150€. Das war reizvoll aber ich habe mich hat es nicht überzeugt. Was mich abschreckt sind die Lomography Bilder, bunt körnig und so gar nicht mein Geschmack. Nach dem ich bei Lomoherz Bilder gesehen habe die mit einer Kiev 60 gemacht worden waren wurden meine Zweifel aufgehoben (LINK). Ich legte mich auf die Lauer nach der Kiev 60 und nach ein paar Tagen war ein Angebot online bei dem ich zuschlug. Kiev 60, 80mm f2.8, 45mm f3.5 und 150mm f2.8, getestet und das für ca. 200€. Und ich habe immer noch nicht die Frage nach dem warum Film beantwortet, ich denke es ist zum einen der Ansporn alles richtig zu machen, da man nur wenige Bilder hat aber auch den Look des Bildes vorab zu bestimmen, Du hast kein Lightroom, du wählst den Film. Für mich war es auch der Reiz des großen Formates und damit die geringere Tiefenschärfe. Nachdem ich mich für drei Filme zum testen entschieden habe ging es auch Bald zum ersten Walk mit der Kamera, mit dabei der Portra 160, Lomography Color Negative 100 und Tmax 100 (schwarz weiß).
Die Ergebnisse ließen mir den Mund offen stehen, das sind wirklich mega coole Bilder, tolle Auflösung und geile Farben. Ja es dauert alles etwas länger aber meiner Meinung sprechen die Bilder für sich. Vielen Dank auch nochmal an die Arbeit von Conny von Lomoherz. Ihre Bilder und Ihre Tests der Filmlabore haben mich bestärkt in die Analoge Welt einzutauchen und es werden noch viele Filme und ggf. auch Kameras folgen.
0 Comments
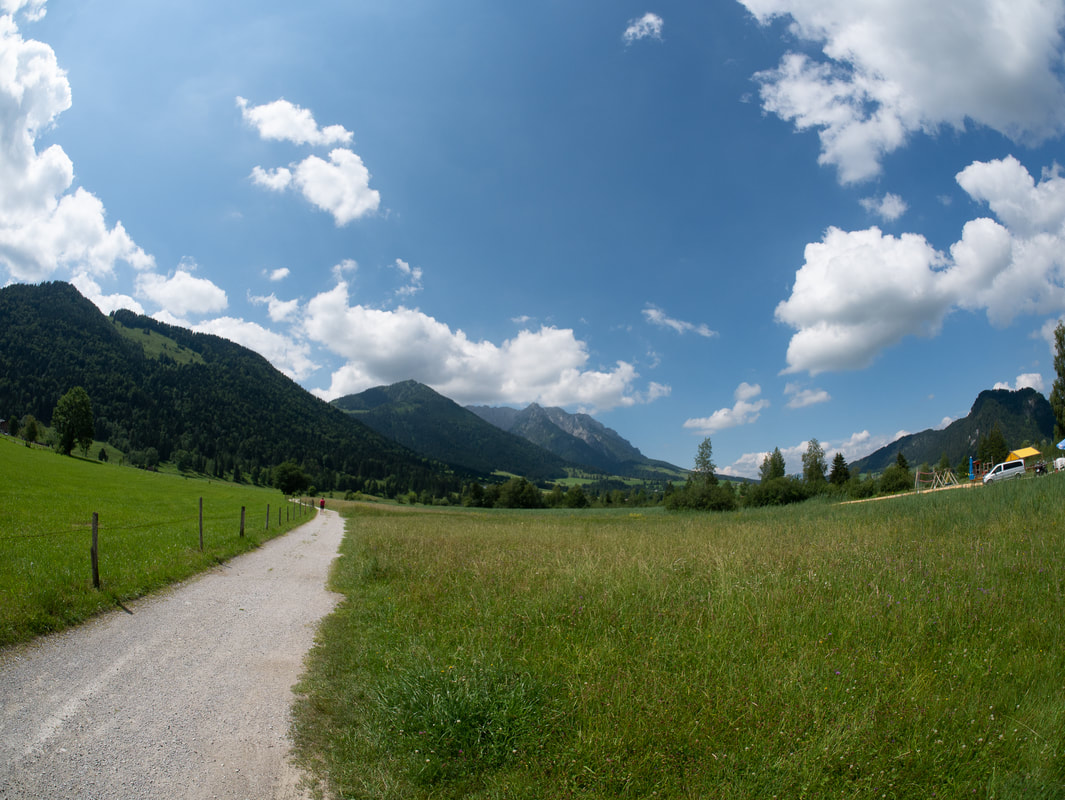
Obwohl ich ein Weitwinkel nicht oft brauche ist es immer wieder Thema auf meinem Blog. Im Urlaub habe ich auf mein 7-14mm von Panasonic verzichtet und hatte neben dem 12-100mm das 7,5mm f3.5 Fisheye in der Tasche. Warum? Weil es klein und leicht ist und ich für meine Schnappschüsse eigentlich nicht die Performance des Panasonic benötige. 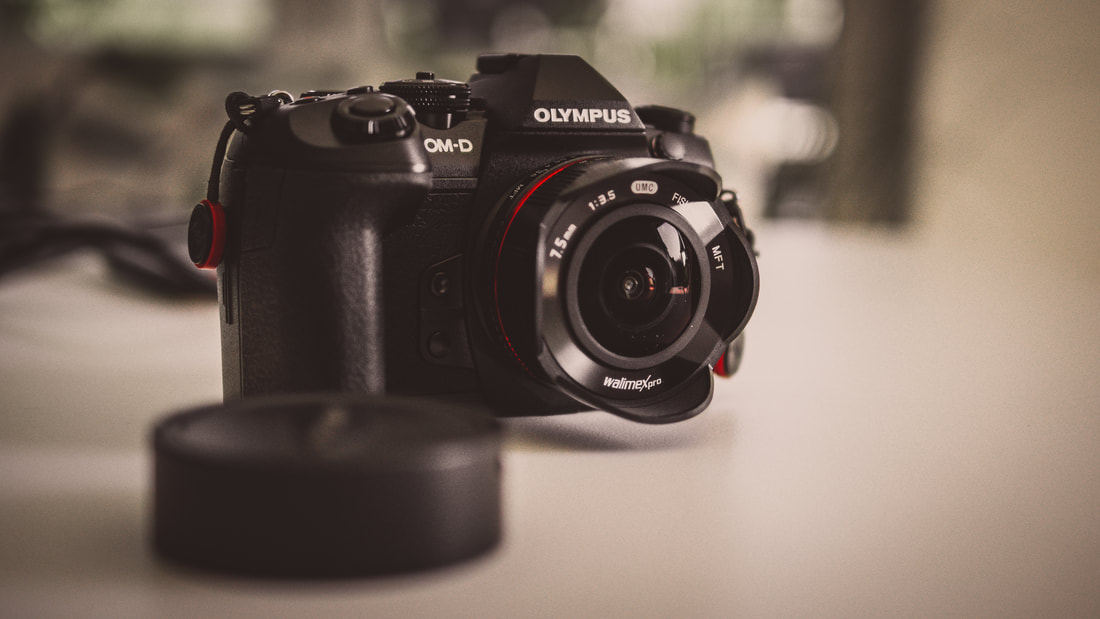 Der Fish-Eye Effekt kann, wenn man den Horizont in die Mitte des Bildes legt ja reduziert werden. Ich habe gehört, dass man der eine oder andere sagt ein Fish-Eye wäre irgendwie natürlicher als ein Ultrawide. Für mich bleiben Fish-Eye Bilder stark verzehrt, was aber nicht schlecht sein muss. Wer aber aus einem Fish-Eye ein Weitwinkelobjektiv machen möchte, der sollte sich in Lightroom mal die Objektivkorrektur ansehen. Irgendwann seit der ersten CC Version und heute kam das Samyang 7.5mm mit dazu und was Lightroom dann aus deinem Fischauge macht ist ein bisschen "Magie". Mit einem Klick ist aus dem Fischauge ein Weitwinkel geworden, Ihr verliert ein wenig an den Rändern aber das Ergebnis ist doch recht gut. Die beiden Bilder zeigen das Original und die korrigierte Version durch Lightroom.
Das Beispiel zeigt in meinen Augen deutlich, dass das Fischauge auch ein pasables Weitwinkel wird. Damit hast Du zwei Objektive auf einmal, einmal ein Effektobjektiv und ein kleine & leichtes Weitwinkel. Das Laowa 7,5mm f2 kann das auch oder sogar besser aber es kostet auch kanpp das 5-fache eines gebrauchten Fischauges. Wenn du nur ab und zu ein Weitwinkel brauchst, dann schau dir das Samyng / Walimex / Rokinon an, ich denke es kann eine gute Alternative sein. Achja, da war noch was. In der Objektivkorrektur habe ich am Regler "Verzerrung" noch ein wenig optimiert, dass solltest Du ggf. auch tun. Damit kannst Du wieder etwas vom Fish-Eye Effekt zurück holen oder noch ein wenig die Linien begradigen. Meine Einstellung für das Bild findest Du unten. (Grundeinstellung sind 100 / 100) 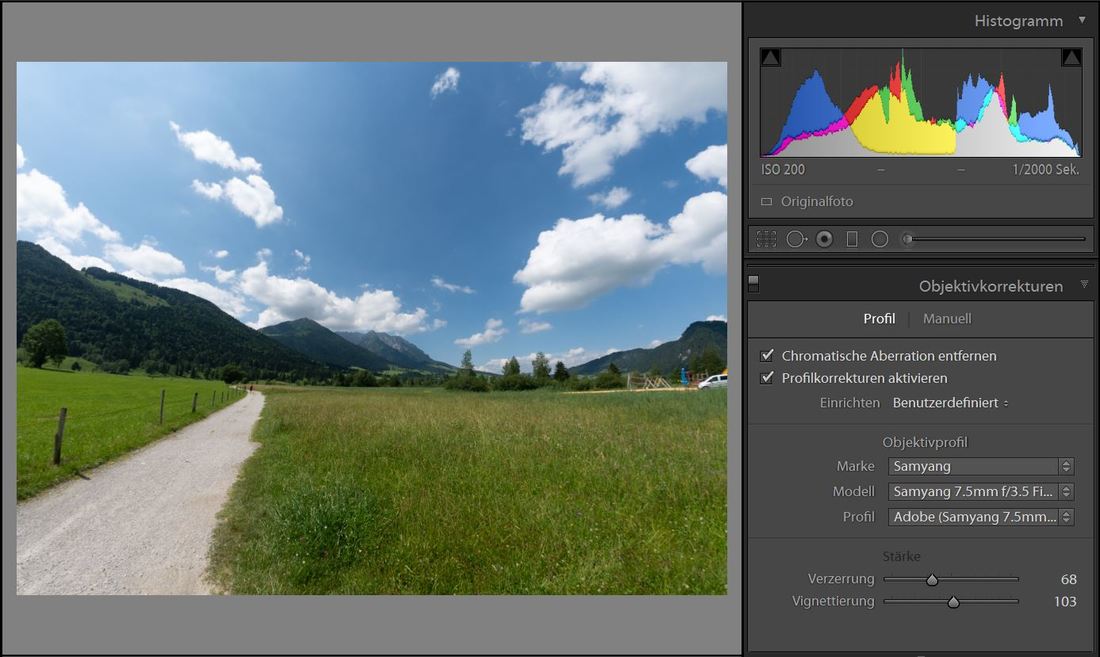 Manchmal muss man einfach etwas neues versuchen und seine Komfortzohne verlassen. Hier mein erstes Video zum Theme "Unscharfer Hintergrund" auf IG TV.
https://www.instagram.com/tv/BkbDqagBTMq/?utm_source=ig_share_sheet&igshid=ve3jqmsok7eg Das Video von Red35 über die OM-D E-M5 Mark 2 hat mich ein wenig zum Nachdenken gebracht oder besser ein Kommentar dazu in unsere Micro Four Nerds Community zu dem Video. Olympus hat sich in der letzten Zeit sehr intensiv mit dem Thema Objektive auseinander gesetzt. Die neuen Pro Festbrennweiten mit f1.2 sind von der Bildqualität eine Wucht aber was ist den mit den Kameras los? Gerade wurde eine E-PL9 in blau vorgestellt, ja das ding sieht echt toll aus aber was hat sich denn seit der E-PL7 verändert? Der Monitor schwankt immer noch nach unten und sie hat kein Mikrophoneingang. Gut 4K Video kann jetzt auch die PEN. MFT war mal ein System was leistbar war aber irgendwie geht der Weg gerade in die andere Richtung, sehr schade. Auch bei dem OM-Ds sieht es nicht besser aus, die OM-D E-M10 Mk III wurde vor kurzem vorgestellt. Auch hier kam 4K hinzu, sonst nicht wirklich mehr. Wenn ich meinen Blick zum mFT Wettbewerber richte sehe ich Panasonic mit einem durch aus umfangreicheren Kamera Line-Up es gibt kleine kompakte Kameras, Messucherstyle Kameras und DSLR Style Kameras und das alles zu einem niedrigeren Preis. Ich würde mir wünschen, dass Olympus uns neue Kameramodelle zu Verfügung stellt und ggf. auch mal Abstand von den heutigen Modellen nimmt und evtl. auch mal eine OM-D E-M2 herausbringt die voll auf Fotografen abzielt oder eine Kamera die richtig klein mit IBIS ist oder eine PEN mit Sucher und Display das nach oben schwenkt. Bei dem aktuellen Vollformat Wettbewerb wird es schwer sein das Preisniveau so hoch zu halten und wenn ja dann wird mFT an Boden verlieren. Wollen wir hoffen, dass mFT lange weiter lebt und Olympus und Pannasonic den Markt aufmischen, ich würde mich auch sehr Freuen wenn Pentax mit in den Ring steigt, da deren Optiken wirklich ausgezeichnet waren. 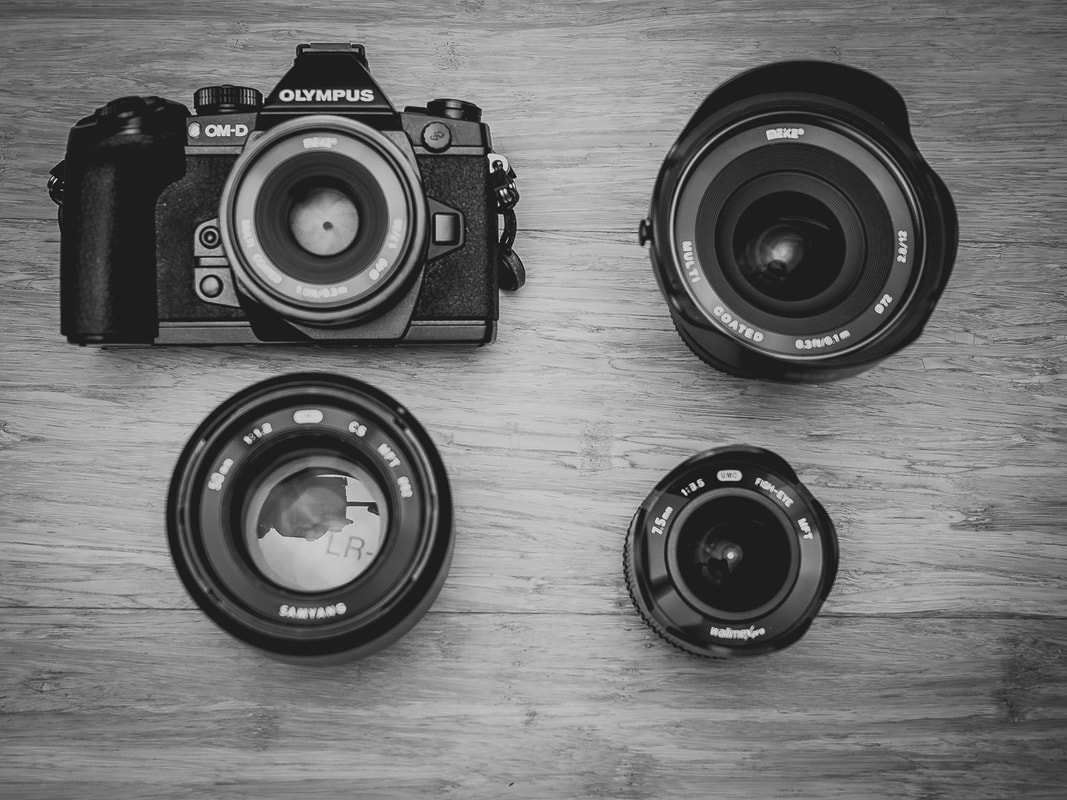 Etwas neues versuchen, heute habe ich einen Gastbeitrag von einem Qlympus Fotografen für euch. Da Stephen aus den USA kommt ist der Blog heute mal wieder englisch. Ich wünsche euch viel Spaß beim lesen! Overcoming the Creative Fog in Photography The creative fog sets on all and can come at any time; it comes frequently and unforgiving. We often find these moments begin when we are often most excited and enthusiastically ready to create. Here is a 3 step guide to get over the creative hurdle.
Often in photography the ease of being able to shoot thousands of images can negatively impact our creative growth. We shoot, and shoot, and shoot in hopes of capturing that one image that will work finding thousands of images that are worthless and can put ones confidence in a lull. To avoid this downward spiral I recommend leaving your camera in bag or pouch until you see in your mind the image before you shoot(now obviously if you are on assignment or shooting fast motion subjects this would be counterproductive so in these circumstances KEEP THAT CAMERA READY TO FIRE FAST!). Before you take your camera up to frame and compose the image in your mind, close your eyes and take the photo to be developed in your soul. Not only will this create a more successful experience this will also help you to slow down and really thing about the subjects prior to pulling the trigger. 2. Unplug your TV! We as creatives absorb the images, thoughts, and experiences we are surrounded by. When in a creative lull I will often unplug my Tv(Which I no longer own), limit my time on my cell phone, social media, music, books and anything can that influence my visual creative thoughts and experiences. I completely withdraw and have found that this gives the soul the freedom to be released from the constraints and influences of our culture to run freely. I will often put down my camera(step 1) and go into my garden, grab a fishing rod, or go for a walk in the woods; allowing the opportunity to self-reflect without thinking about photography. This unplugging minimalism is a great way to allow you mind to wander and reset. When the thoughts of photography and forced creativity no long are actively conscious on my mind at this moment I know that we have reset and give ourselves permission to explore our creative self. At is time wander and explore further until you no longer have a NEED to create. When you do not force the shot everything will come together in the creative process. 3. STOP Studying other PHOTOGRAPHERS!(Sorry Chris) — But really you need to find yourself and that can only happen from within. When we explore, study, mimic other creatives and their techniques we are self-inflicting boundaries imposed by the styles of those who have navigated and developed the style of images. Subconsciously when we are shooting it is easy to slide into the perspective of those images we have seen previously from other creative styles and we end up shooting similar to those who have influenced us creatively. During the quest for creativity it is vital to remove all those resources that will impact your works and creative mindset. Now while I highly recommend unplugging from studying other photographers creative style by no mean do I suggest a complete unplug from the community. We are so blessed to have some many different people, cultures, and perspectives from around the world and with today’s open communication I highly urge you to embrace the community and lift each other up. Share your thoughts and experience, trials and tribulations with other and help support their grow and in time this positive community will return the favor. The world is a beautiful and wonderful place filled with limitless creative opportunity for all of us photographers to capture and share with the world. To capture this beauty that is outside of our focus we often need to refocus within ourselves. Put your camera down, unplug the TV, and Study your own self without the influence of others; utilize these three techniques for overcoming the creative lull I am confident you will find yourself outside your own creative constraints. About Stephen Stephen Cunic is an American Photographer with concentrations in North American landscapes. Stephen has dedicated over two decades as a conservationist and photographer applying his passion for the wild lands of North America sharing the natural world through his unprecedented Present Perspective Photography.
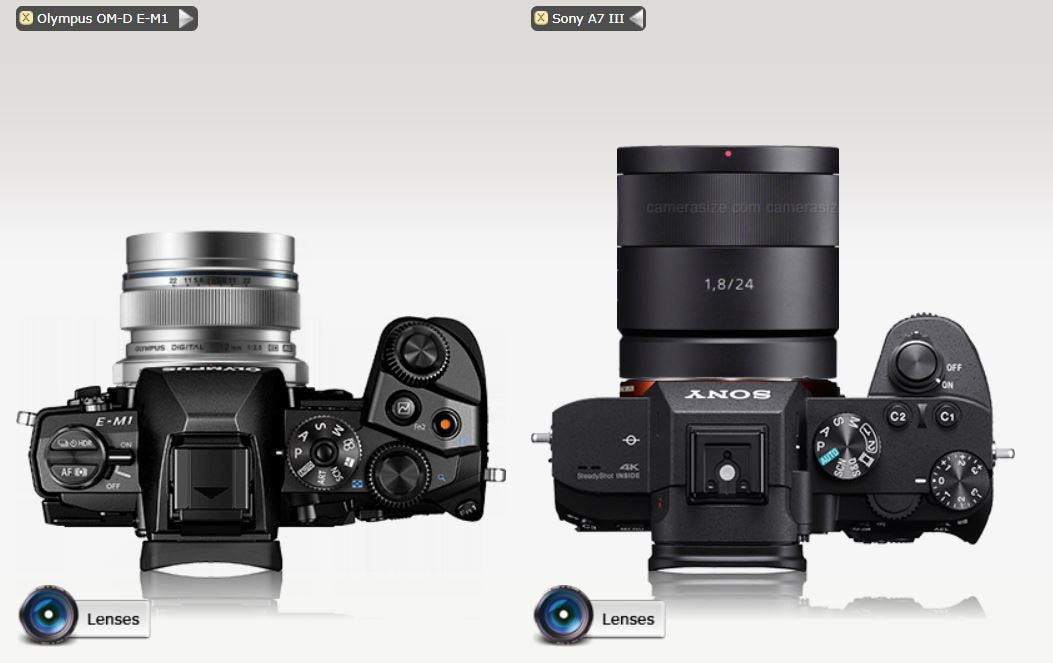
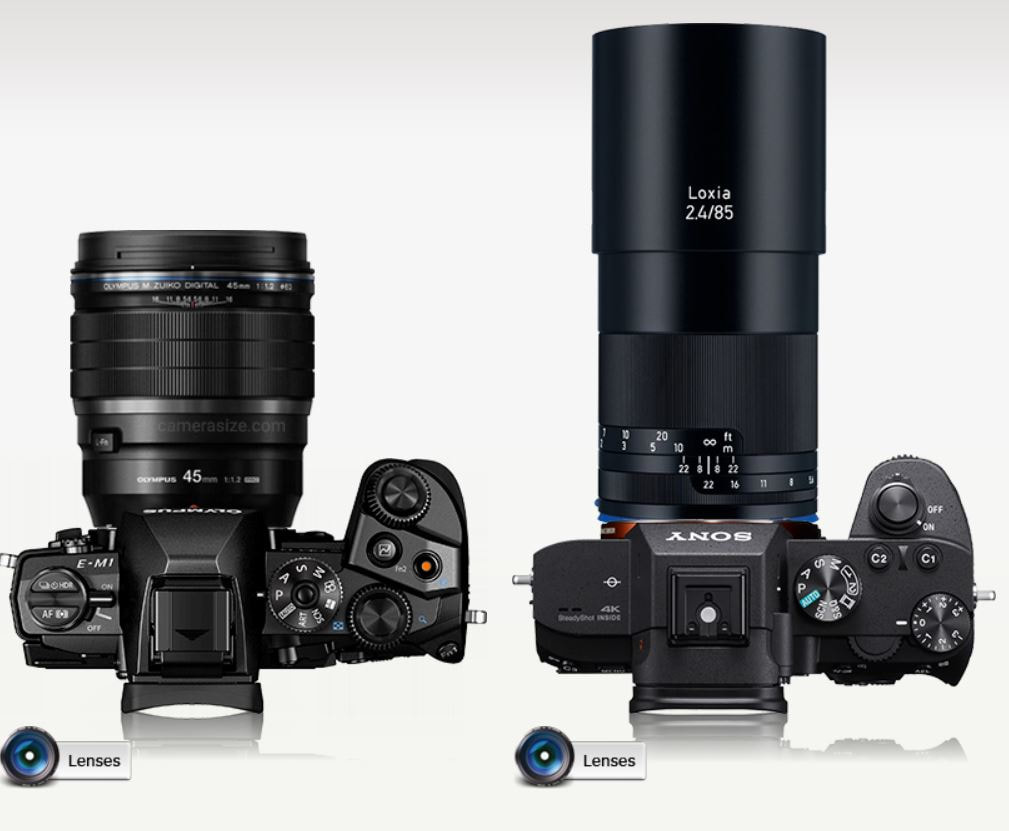
Stephen started his photography career in 2000 crafting photographs in a traditional black and white darkroom developing skills in understanding and crafting of the traditional technique. This foundation reinforced the concepts in which are the foundations to the basis of Stephen's revolutionary artwork. Through an arduous printing process, he takes time and dedication to prepare digital prints in a way that are composed from his knowledge and workings in the photographic darkroom. The process through a revolutionary printing discovery Stephen made, takes multiple layers building physical depth through the relieve and build up from physical ink on a specialty sub-strait able to handle the laborious printing process. Each individual layer is printed and developed by Stephen over the course of multiple hours building up definitive aspects in which are vital to the observable textures, depths and dimensions necessary to the final sculptural-like works he creates. This physical dimension created through his processes allows the observer the opportunities to reflect upon the image as if they are physically within the environments Stephen wants you to experience. As he has spent prolonged periods of time within these environments, he invites you to reflect "as is". Just as one observes the natural landscapes and a realm in real life, Stephen creates works that allow an individual visual experience through time, place, and self-reflection without the artists self. The works allow an individual to experience the piece without influence from the artist and true reflection and journey for the individual observer; an invitation to look at every element and self-reflect through a personal journey and experience. These self-reflections are the journey in which we can truly embrace ourselves and experience the works in the Present Moments as observed; changing with the environmental influences of the physical space and the positioning approach of the observer. Stephen has traveled exploring the natural wildness and environments of North America and beyond, and through his innovative Present Perspective Photography he allows one the opportunity to experience the moments of solitude and bliss in which one can embrace in hours of exposure to the natural world. Seit nun mehr als 1,5 Jahre bin ich exklusiv mit mFT Kameras unterwegs und bin wirklich sehr zufrieden. Doch immer wieder flackert ganz hinten im Kopfe der Wunsch nach "Vollformat" auf. Auch in unseren Facebook Community Micro Four Nerds kommt immer wider die Frage nach einem Wettbewerber auf Sony. Aktuell die Kameramarke mit dem neuesten Line-up an Kameras und Objektiven und zugleich der einzeigste Hersteller mit einer Vollformatsystemkamera. 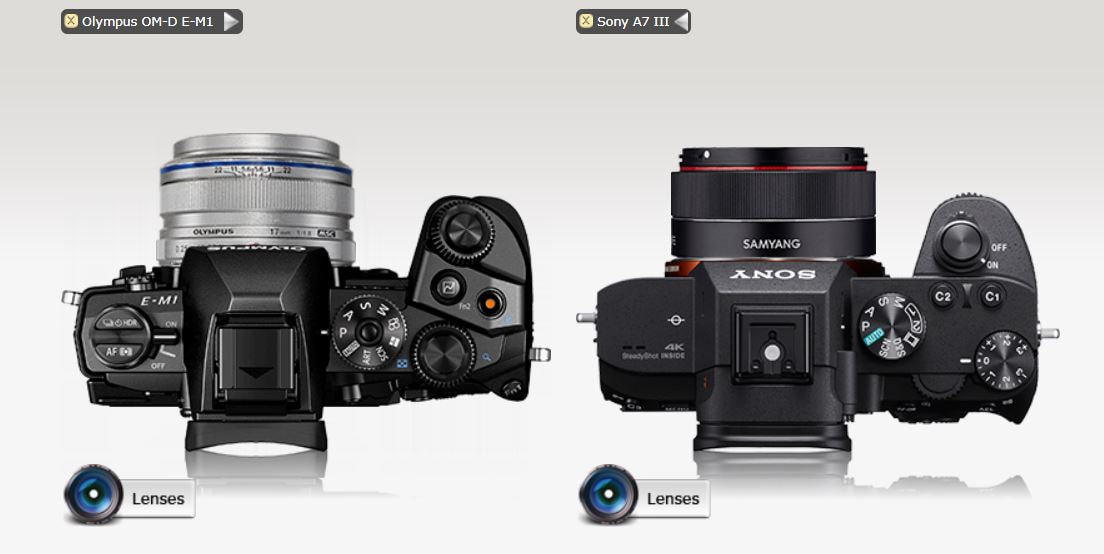 Vergleich OM-D E-M1 mit 17mm f1.8 vs. Sony A7 III mit 35mm f2.8 Vor kurzem kam die neue Sony A7 III auf den Markt und man sieht plötzloch, dass mFT garnicht mehr im Vorteil ist wenn es um Größe bei Vergleichbarer Tiefenschärfe ist. Klar die Lichtstärke der Olympus ist im Vorteil aber die beiden Kameras sind vergleichbar groß. Das Blatt wendet sich aber schnell bei anderen Brennweiten.
Ich tappe immer wieder in die Vollformathysterie und fange an auf Ebay naxh der A7 zu suchen, dann merke ich, dass es doch ganz schön teuer ist. Dann überlege ich was den so wirklich anders wäre mit dem "Heilsbringer" Vollformat. Was ich als Vorteil festhalte wäre geringere Tiefenschärfe und besseres Rauschverhalten bei richtig hohem ISO und der größere Dynamikumfang. 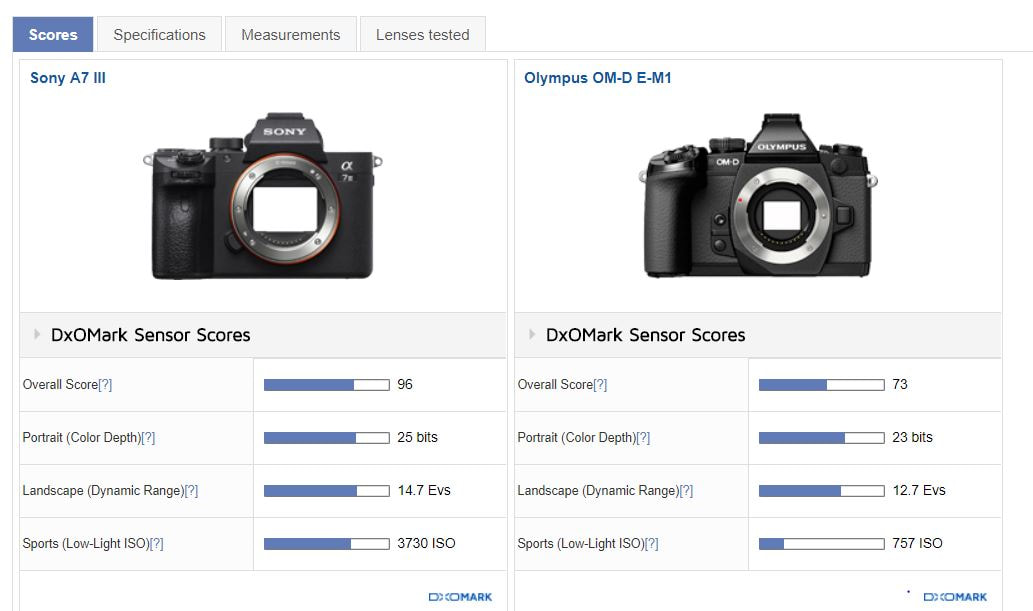 Ja, die Daten der A7 III sind wirklich beeindruckend aber die ISO Performance meiner OM-D E-M1 passt für mich so wie sie ist. die Tiefenschärfe mit meinen f1.2 Objektive (von Samyang) passt auch. Der Dynamikumfang ist mit 12,7 Blenden OK, wenn ich sehe das eine A7 III 2 volle Blenden mehr hat haut mich das schon um, dass sind 4 mal mehr Kontrastwerte als bei der E-M1! Schin krass aber ich habe es noch nicht gebraucht. Also ist die A7 III die bessere technische Kamera.. Für meine Fotografie, dass heißt viele Fotos wärend der Runden mit dem Hund, Macros in der Natur, ab und an mal Portraits und natürlich sein 12 Wochen Fotos von meinem Sohn, mFT absolut das richtige. Das System bietet mir das was ich möchte zu einem annehmbaren Preis. Ich verdiene mit meinen Bildern kein Geld und brauche nicht das technisch beste. Ich brauche etwas das zu mir passt und ich liebe meine Kamera.
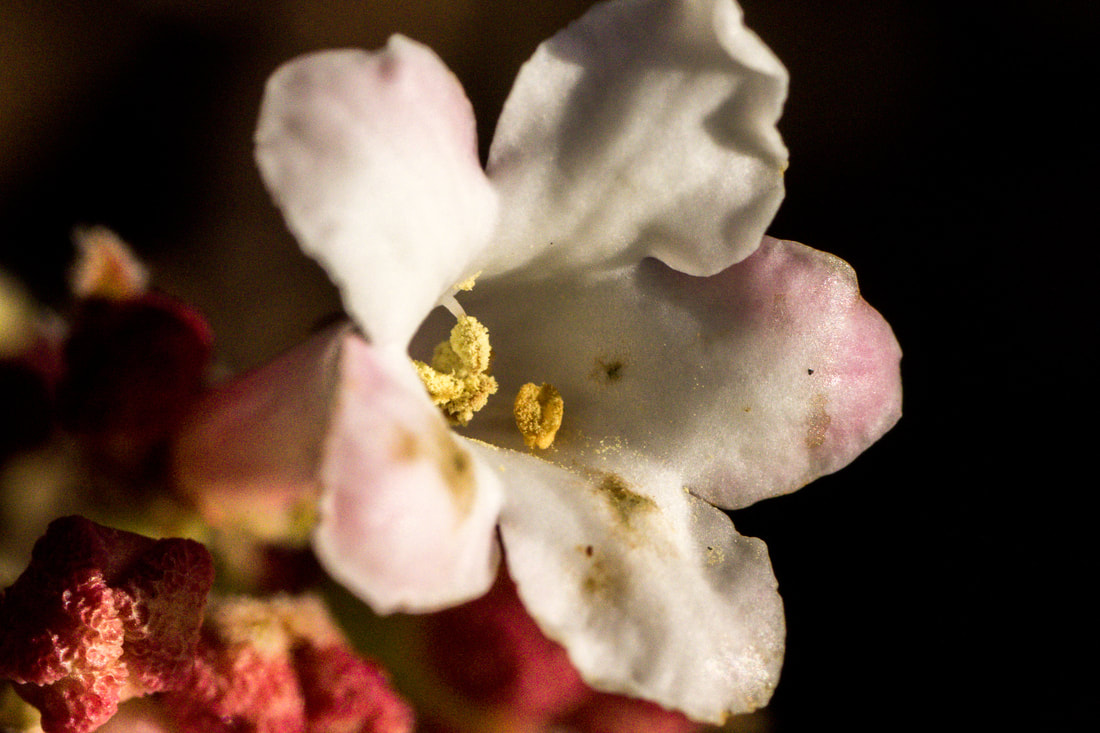
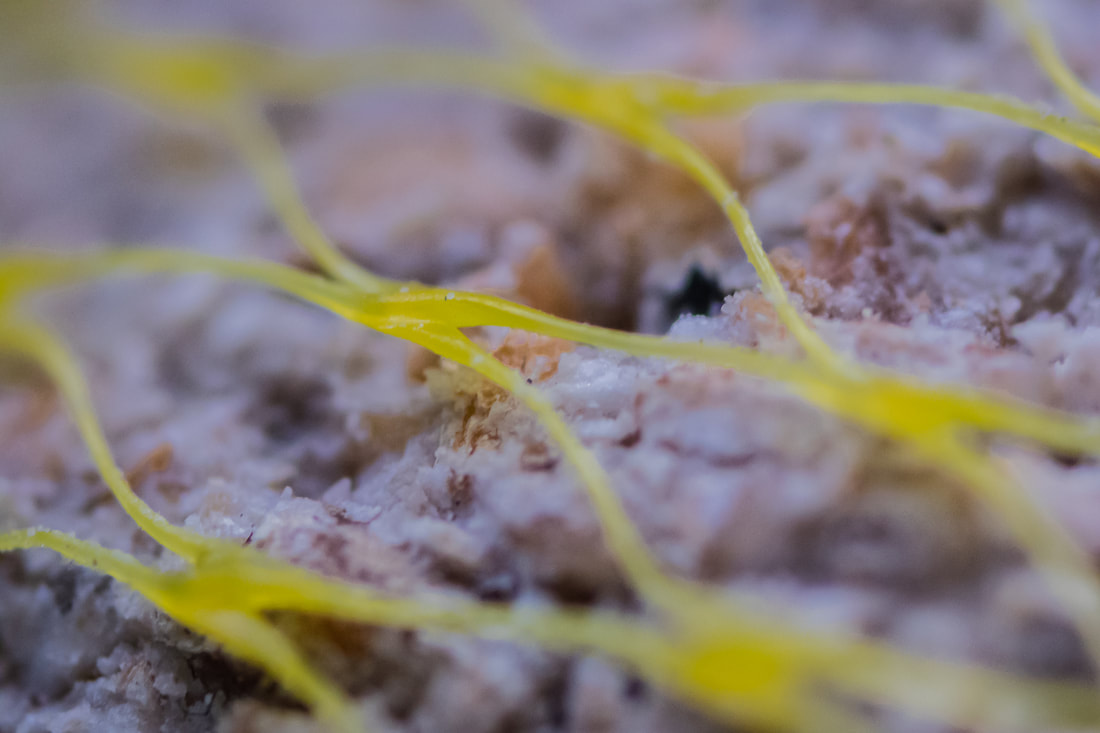
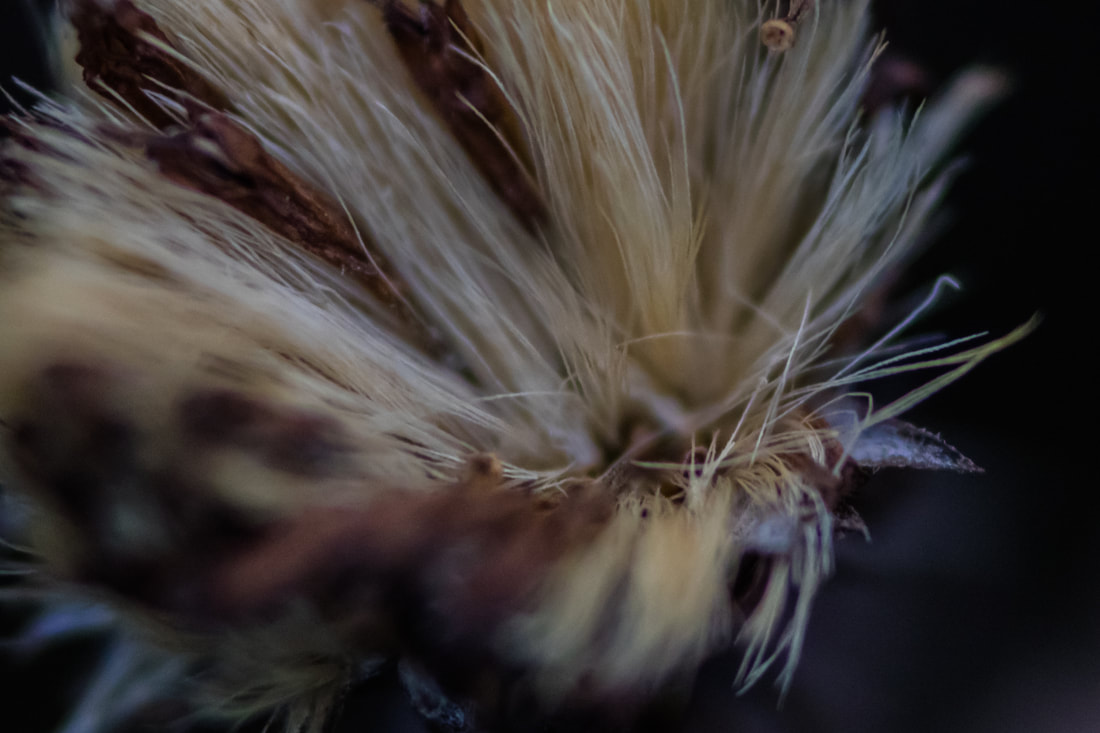
Im Dezember habe ich mich dazu entschlossen meine Zooms auszumisten. Die Entscheidung habe ich mir nicht leicht gemacht aber das M.Zuiko 12-40mm f2.8 Pro musste gehen genau so wie das M.Zuiko 9-18mm und das Laowa 7.5mm f2.0. Neu in meinem Schrank ist nun das Lumix G 7-14mm f4 und das M.Zuiko 12-100mm f4 IS Pro.  Ich nutze das 12-100mm an einer OM-D E-M1 und OM-D E-M5 Mark II. Als ich das Objektiv gekauft hatte war mein Fokus nicht auf dem Stabilisator, da ich davon ausgegangen bin, dass der Dual-Stabilisator nur an der OM-D E-M1 Mark II funktioniert. Weit gefehlt, der Dual-Stabilisator funktioniert an der OM-D E-M1 Mk2, der OM-D E-M1 Mk1, OM-D E-M5 Mk2, OM-D E-M10 Mk3 und an der PEN F. Dies finde ich bemerkenswert, dass Olympus auch ältere Kameras updatet so dass man auch mit diesen Kameras die neueste Technologie nutzen kann. Der duale IS macht es wie als ob man die Welt einen kleinen Moment anhält. Der Stabilisator wirkt wahre wunder, die ersten Testaufnahmen mir 1s bei 12mm Brennweite bzw. 1/2s bei 100mm zeigten schon Ergebnisse die beeindrucken. Mann kann auch länger die ISO unten halten und so den Nachteil der mFT Kameras, dass sie bei hohen ISO schneller rauschen, unterbinden. Der Stabilisator wirkt auch im Videomodus, so kann man mit etwas Übung Aufnahmen ähnlich wie mit einem Gimbal erzielen. Das alles rechtfertigt meiner Meinung nach den hohen Preis. Was ich vergessen habe das Objektiv ist auch noch spritzwassergeschützt. So nun ein paar Beispielbilder die ich mit längeren Belichtungszeiten gemacht habe. Nachdem ich vor ca. einem Jahr das Meike 12mm f2.8 getestet hatte bekam ich von Meike die Möglichkeit das neue 85mm Macroobjektiv zu testen. Ich teste nicht auf das letzte Pixel oder auf irgendwelche theoretischen Auflösungen sondern ich packe das Objektiv in meine Tasche und gehe raus. Damit ist mein Bericht ein reiner Erfahrungsbericht, der meine persönlicher Meinung wieder gibt. 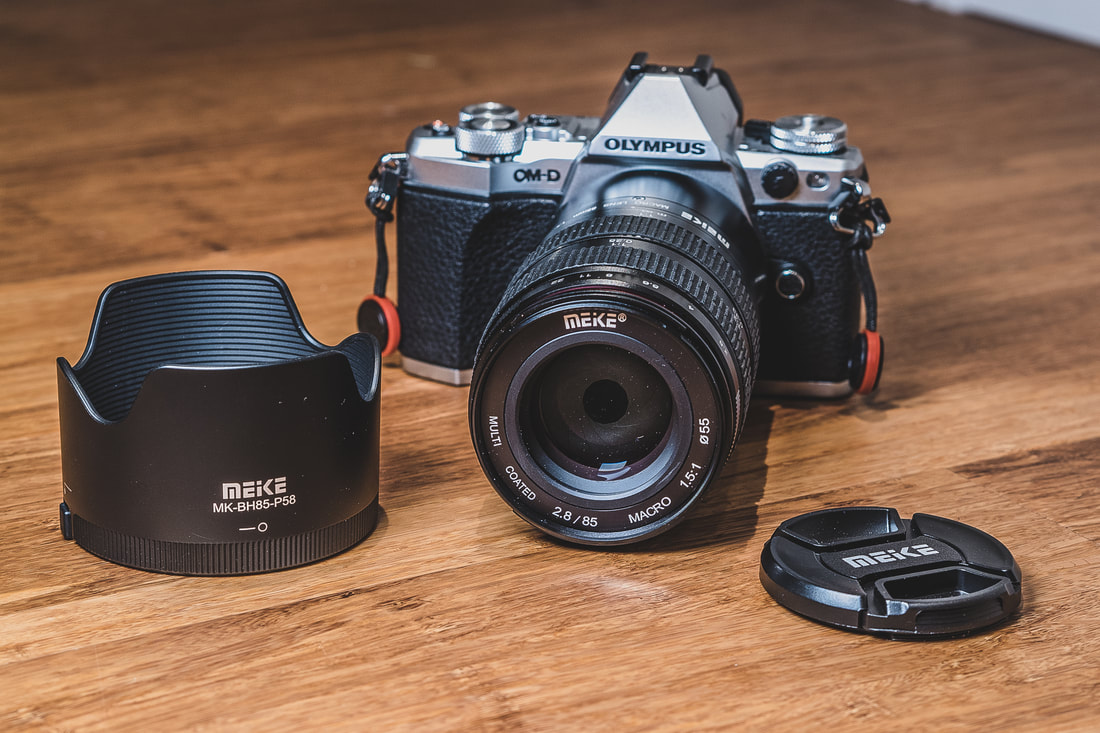 Lieferumfang & Verarbeitung In der Packung war neben dem Objektiv ein Front- und ein Rückendeckel, eine Streulichtblende und ein Transportbeutel (den ich nie nutze). Das objektiv ist sehr stabil aus Metal gearbeitet und macht einen sehr wertigen eindruck. Die Sreulichtblende wurde gegenüber des 12mm Objektives deutlich verbessert, an der Blende ist eine Arretierung die verhindert, dass die Blende nicht versehentlich verloren geht. 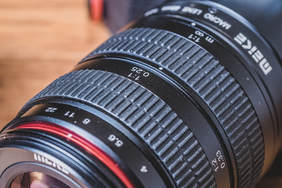 Handhabung Das Objektiv hat zwei (!) Fokusringe, der eine von Unendlich bis zum Maßstab 1:1 und der andere von 1:1 bis 1:1,5. Das ist erst einmal gewöhnungsbedürftig aber eigentlich auch ganz praktisch, da man im Macromudus an dem einen Ring auf 1:1 stellt und dann mit dem andren Ring die Vergrößerung einstellt. Wenn man in den Vergößerungsmodus wechselt, dann verlängert sich das Objektiv um ein gutes Stück. Bei 1:1 lieg der minimale Abstand zur ersten Linse ca. 12cm bei 1:1.5 bei ca. 10cm. 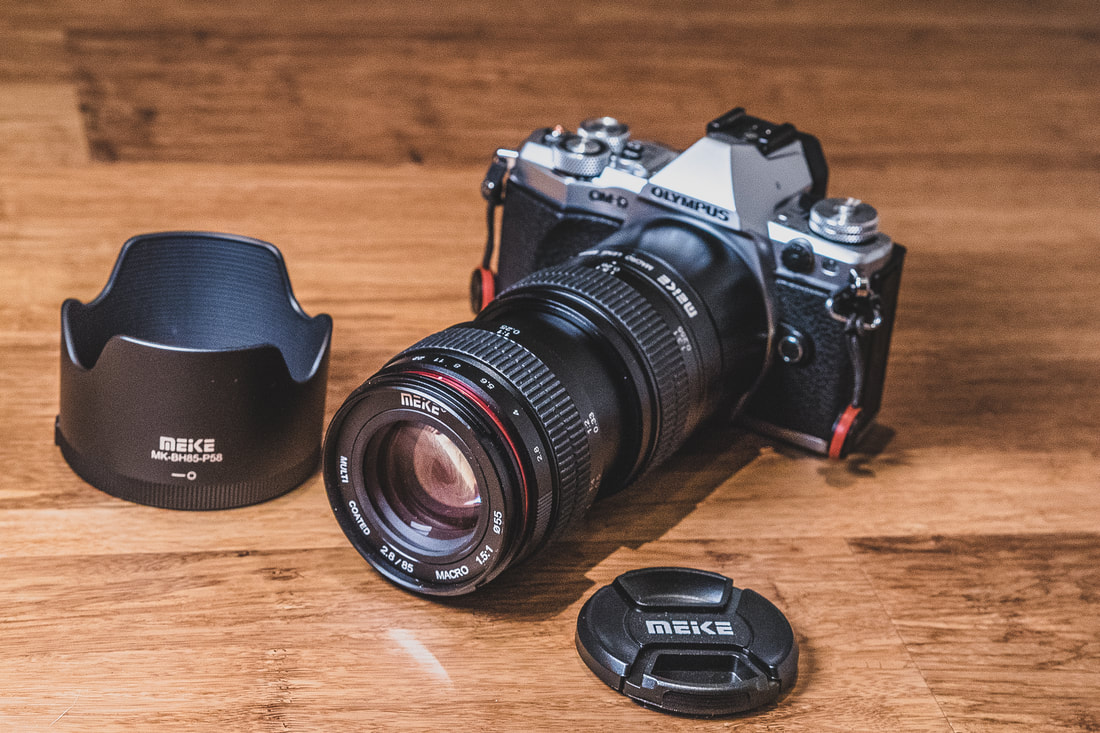 Die Arbeit mit dem Objektiv gestaltet sich herauszufordernd immerhin sprechen wir an der Micro Four Thirds Kamera von einer Brennweite von 170mm. Aufnahmen bei wenig Licht sind ohne Stativ so gut wie nicht möglich. Auch der Stabilisator der OM-D E-M1 kann da nur bedingt helfen. Erschwerend kommt dazu, dass die Tiefenschärfe so knapp ist so das man eine sehr ruhige Hand braucht. Beispielbilder Vergleich 1:1 und 1:1,5 Natürlich ist die Stärke des Objektives das außergewöhnliche Macro und das ist wirklich beeindruckend. Ich denke im Sommer wird das Objektiv außergewöhnliche Bilder liefern können. Die vier Bilder zeigen den Unterschied zwischen 1:1 und 1:1.5 Fazit
Für 299€ (12/2017) ist das Objektiv ein wahres Marco Monster, Monster da die Scharfstellung Übung benötigt aber die Ergebnisse sind bei genug Licht wirklich sehenswert, auch die Verwendung als Portraitobjektiv ist sinnvoll, das Bokeh ist weich und schön anzusehen. |
Author
Photonerd, 36 years old, Mirco Four Thirds Shooter. Archive
July 2018
Category
All
|


 RSS Feed